


Most of everyone’s beginner airbrushing woes were the result of two things, the improper care and cleaning of the airbrush, and not being able to reassemble a gun once it had been taken apart. Hence, we hope this article will help others avoid the frustration and will keep the airbrushing experience fun and dandy.
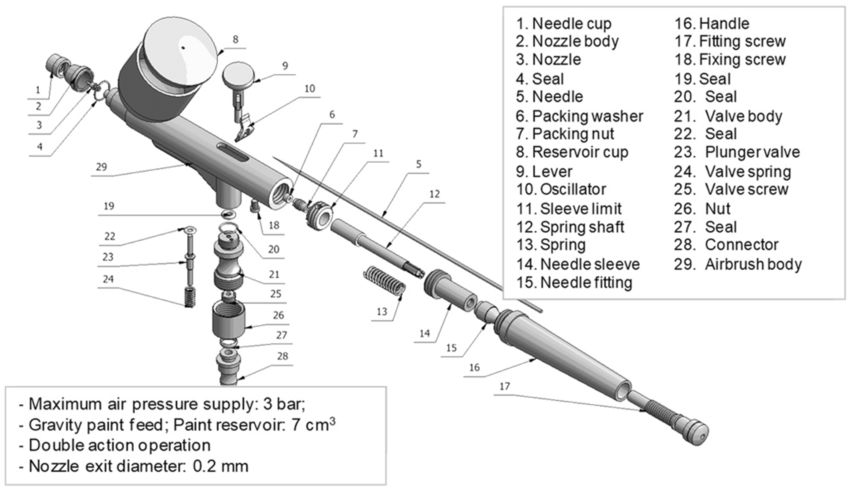
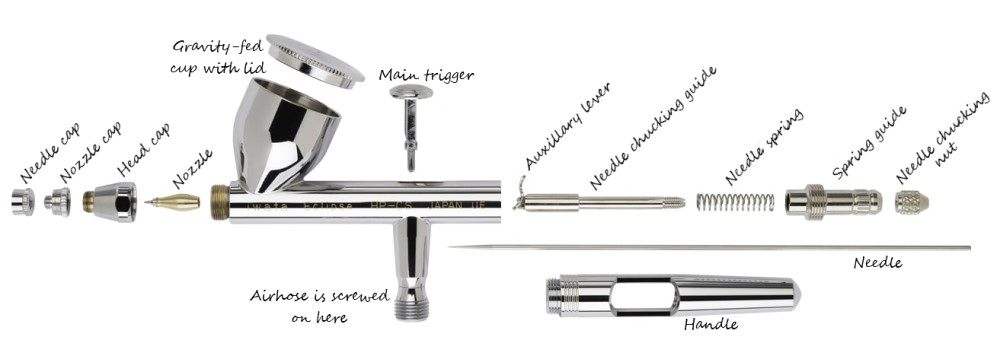
Firstly, we will be specifically zooming into the double action, top load (cup) kind of airbrush. The kinds where we miniature painters use. And depending on the brands that you use… MOSTLY ALL of them have this general design as shown below.
Caring for the Airbrush
So the airbrush is brand new out of the box and you have started using it already. Rule number 1 is to BE CAREFUL with the needle.
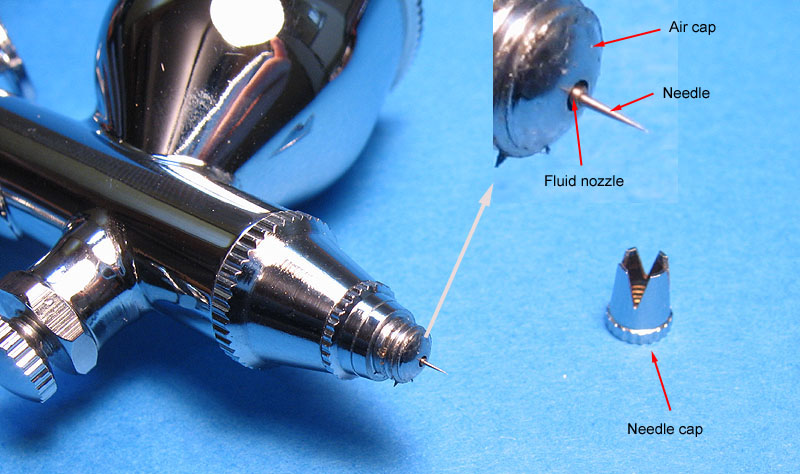
- The needle cap is there to protect the needle from being exposed so you won’t accidentally knock them onto anything… especially the model you are working on OR when you are placing the airbrush back on to the holder.
The needle’s function is to regulate the “atomized air and paint mixture” that is coming out of the nozzle. When you are not pulling back the trigger… the needle is fully occupying the nozzle so no paint will come out. SO BEST not to bent it or spoil its tip. A bent needle tip will cause the spray to skew to a rather obvious angle. You will end up spraying something else instead of the intended target.
2. Do NOT let paints dry. If possible, set up your airburshing station near a water tap and sink. If not… you can build a mobile water tap and sink by connectiong of hoses… drain, disconnect and keep when not in use kind. WHY?
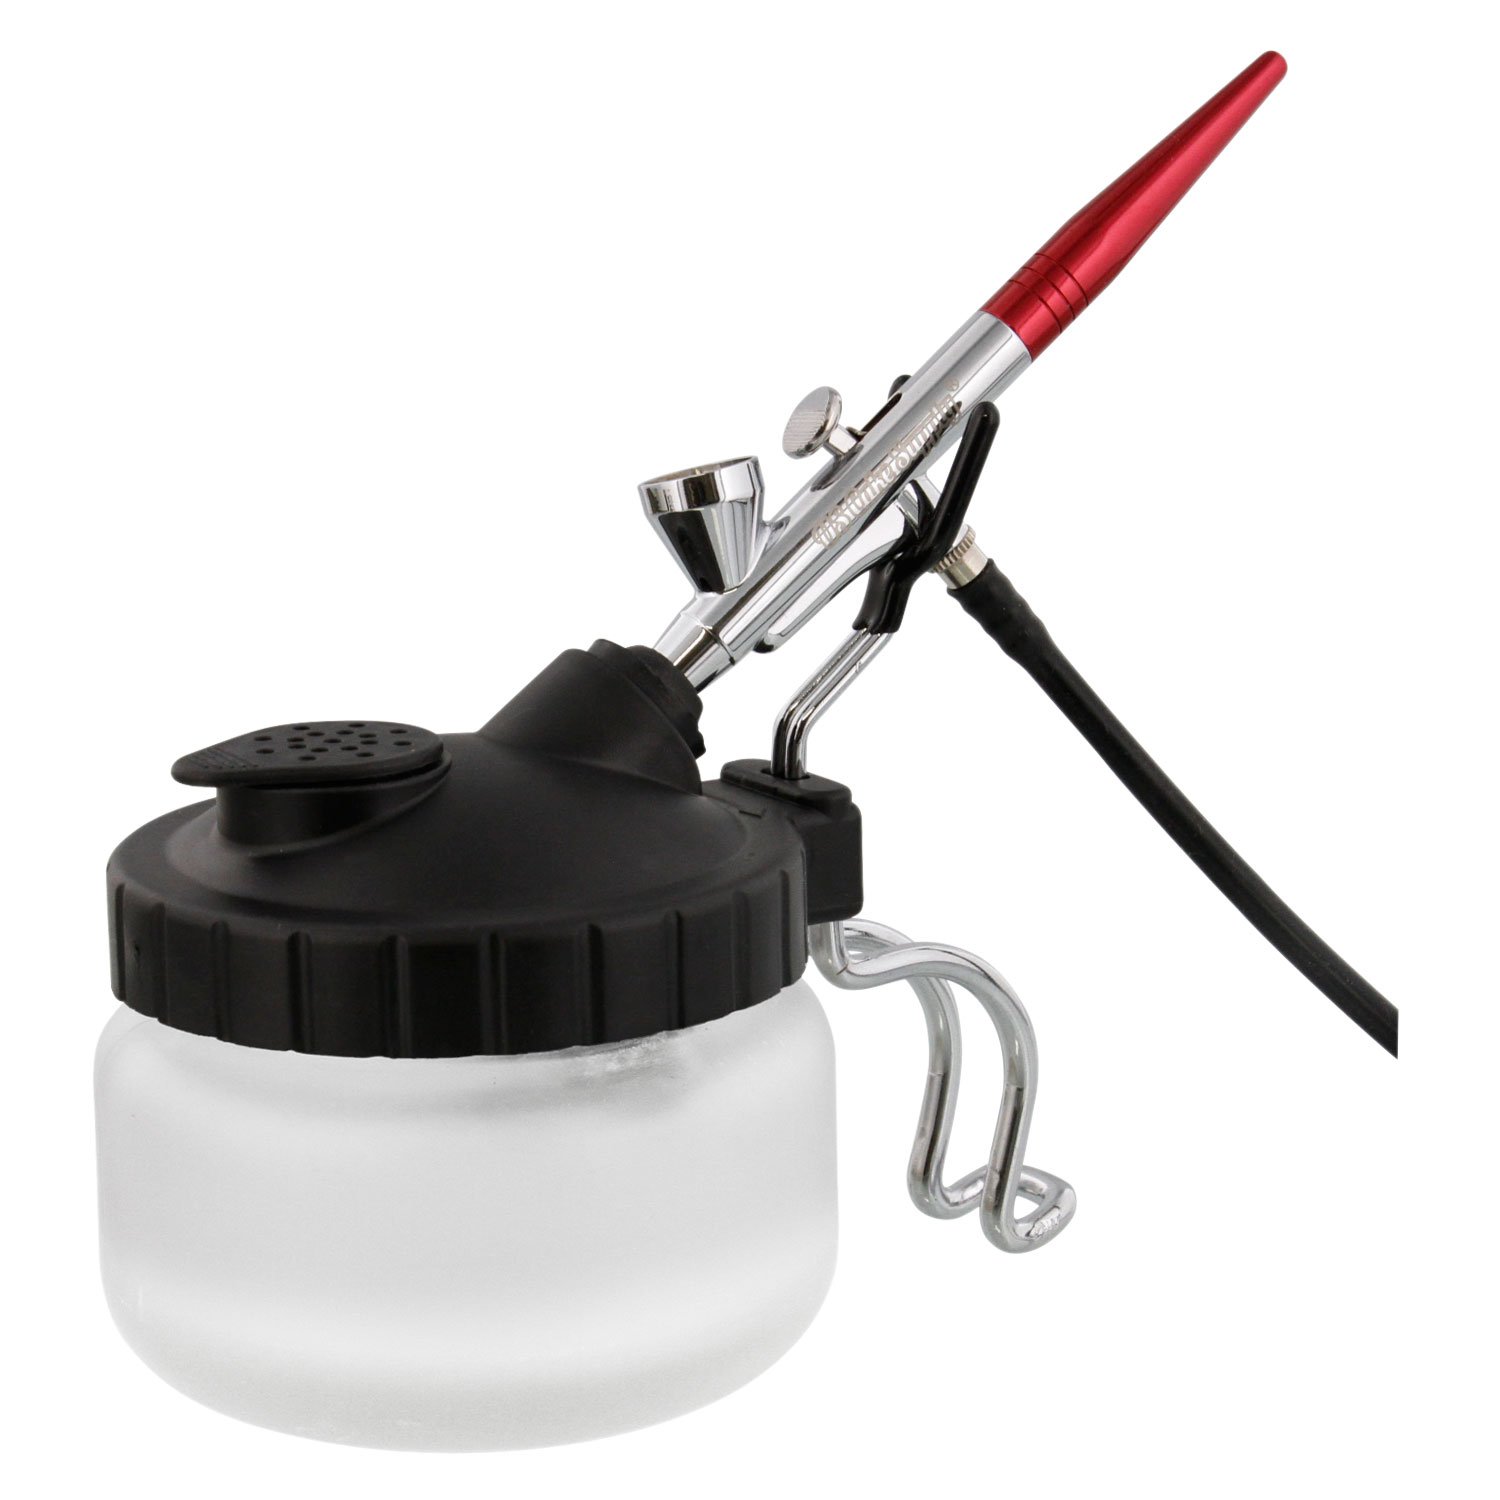
So after each spray color , in between, run through the airbrush with water… via the cup and spray out. Blow back until it bubbles… lightly unscrew the Air Cap (DO NOT FULLY UNSCREW) and screw it back in (repeat a few times). We are hoping to clean out any excess of the previous color we were working on.
If you cannot do this with a sink beside… the next best thing is to have a cleaning pot and a dispenser bottle of water… airbrush cleaning fluid is BEST…next best thing is vinegar water mixture. As if on the water sink, the cleaning pot is use to contain the spray of the excess water paint mixture.
What’s happening here is you are flushing the airbrush with water to clear it of the remaining paint. Pressing down the trigger and pulling it back and forth while pouring “cleaning liquid” a.k.a water through the cup HOPING to clear the nozzle and needle cap of paint.
SO LET US REPEAT THIS TOGETHER…
MUST NOT LET PAINT DRY in the cup..
For whatever reason that the paint has to dry up in the cup…. we will have to go through Part 2 of this 101 call Mantaining your airbrush, which we will write up soon. We kinda want to keep the article bitesize so you won’t fall asleep halfway reading.
So there you have it… caring for your airbrush is simple. Keep the needle safe and do not let paint dry. Of course there is much more to it… lets put it in bullet points.
- Using Airbrush ready paints (most brands will have BRUSH paints and AIRBRUSH paints)
- The PSI level to use
- The kind of compressor you are using
All these will eventually be covered later on… so stay tuned!


